Saturday, 27 February 2010
"I need support damn it!!!!"

Wednesday, 24 February 2010
Signs, Signs, there everywhere, but where do I go?
Tuesday, 23 February 2010
Work for next Tuesday
Mind your Head
Friday, 19 February 2010
dont forget to flush!

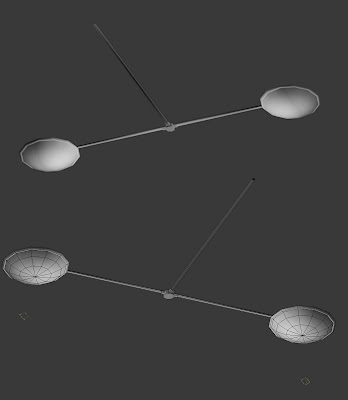
It took a little tweaking as somehow the placeholder pivot was still off im not sure how that happened but meh these things do. but you'll be glad to know zongyi that your toilet is in ^_^. Yes i realise the flashlight isnt displaying any shadows that would be a small forgetful fail on my part there lol. ill get the the mens in then woo :D
Thursday, 18 February 2010
Wednesday, 17 February 2010
Thursday, 11 February 2010
Progress shot

Thanks ^_^
Paint overs for the windows
Wednesday, 10 February 2010
Tuesday, 9 February 2010
Repeating Assets & Texture Sharing
- Bin
- Chairs
- Sofas
- Desks
- Some doors
- Keypads
- Some Lights
- Light switches
- Stairs
- Banisters
- Toilets
- Fire Extinguishers
- Signs
- Pipes
- Some windows? (depending on the different styles in the building)
Areas sharing texture space:
- Walls
- Flooring
- Ceiling
Not sure if i've missed any?
Writing on the walls - images from Left 4 Dead

We could put writing near the lighting where the player is most likely to take their time navigating around the area to influence curiosity and draw the player to the next door/area.
Let me know what you think :)
Colour and paint
Screen shots from silent hill
Game Art of Bioshock
http://www.youtube.com/watch?v=1GkQ1fprBKI
the Lead Environment Artist, Hogarth de la Plante. Talks about how the environment were designed and how the lighting was used to create a really effective atmosphere.
There are also another 4 videos on the design of Bioshock, Including Character design. Definatly worth watching
Work schedule
Mark
- Concept male toilets in middle floor. Start modelling some basic objects e. g. cubicles, urinals, etc.
Priya
- Make list of repetitive assets. Concept the stylisation. Colour schemes, etc.
- Concept different ways of blocking up doors: barricaded doors, boarded up doors, locks, padlocks, broken keypads, etc
Aby
- Assign the layout of the blockaded objects to the floors.
- Concept windows. Grimed boarded up, cracked glass, etc.
Simon
- Concept the pipes; broken, grimed, etc.
- If more time, start making/testing the assets on ceiling.
Andy
- Concept stairs; grime it up, think of how the middle staircase is blocked off (objects in the way? broken off?).
Zongyi
-
- Concept female toilets. And other things.
Unreal Notes from Si's lesson
Export mesh from Max with several IDs.
Call the box a certain code, "UCX_
Box - Do not modify. Attach everything else together.
Assign IDs in max like one normally would.
Have 1 diffuse in canvas slot. Just need diffuse in first one to work.
When comes to exporting, slot has to be assigned to diffuse.
Select all in the collision, Export > Export Selected > Save to a folder. Save as ASCII Scene Export (.ASE).
WWW.HOURENCES.COM!! Advanced tutorials and help for Unreal. And Unreal Wiki.
-IN UNREAL -
First thing to do, add a light. Hold L and left click.
- Small black box button next to a pair of binoculars. "Content Browser" window comes up. A place to store textures, materials, collision meshes, etc.
Import object. Give package new name in Unreal. Ignore next pop-up window.
And the model is IN!
- Import textures. If diffuse, leave the Compression Settings to default. If Normal map, then select "Normal" otherwise won't work.
Can't simply assign textures to model. Must make materials like Shader. Right click, New Material. Opens up Material Editor. Go into TextureSample >Drag in texture you have and pull top black box to Diffuse in List
"PreviewMaterial". Blend Mode > Masked blend.
Simply pull the boxes on the left side of the Texture box to the list on the left. Eg. when assigning alpha, pull white box to OpacityMask.
Right-click > Static Mesh > Materials > Assign from content browser.
- SCALING -
One character = 96 Unreal units.
In Max, always scale a model next to a biped of 96 Units.
In Unreal, select the static mesh. Left box scales everything.
- BRUSH -
Brush is the red box. Right-click on brush, > Add volume > Lightmash importancevolume > That will stop the light gonig outside the box. Keeps light bouncing inside.
- WHILE IN "GAMING MODE" (Right-click > Play from here). -
While in "gaming mode" 8D: Press Tab. Behind view > Fly: to navigate through level.
Ghost -on. Go through walls. Jump around easier.
Press windows tab for full-screen lol.
To hide gun, it's show hud.
- HOW TO SAVE -
Right-click on Package > Save > Make 2 folders (one called "level". And then "UPK"). SAve in UPK. The package is what we save as.
If want to move, select all in the Content Browser and go into "LEvel" foldier.
- HOW TO OPEN FILE -
Go to Content Browser, load Package. Click the little Open Folder icon. Then Open Package. Package opened. F'yeah.
When building, if there are any gaps then lighting will go bad. Don't ever change Drag Grid. Ever. Keep Snap Grid on. At 16.
- ASSIGNING MATERIAL TO FLOOR -
Drag 'n' drop.
- TOOLS -
Use a Gizmo tool to scale.
Select what you want to import first.
Go into UDK files. > UTGame > Screenshots. Find screenshots of super high res.
Have own work. Do work on uni machines.
Monday, 8 February 2010
whitebox and unreal
 Hey guys and gals sorry so late with this entry anywho no point giving excuses, on with the blog(sorry if i waffle on lol).. The white box has been done and over the weekend i was experimenting with it by trying to find the best way to use it in unreal. In the end although not time efficient in principle, in practice recreating the mesh using unreals brush tool seemed the more time efficient option after issues importing the mesh ( even in parts) as a brush for use as the bsp.
So think of the placeholder model(whitebox) as your reference point for placing your objects into the game. I strongly recommend that once everyone is allocated a section of the model, that you add simple cube objects which are labeled as the different assets.

Obviously we need to set aside those that are repeated assets and those which to be used once. These will be separated by separate folders but naturally everyone will get access to both of them and there textures as we should update the texture and model library constantly and keep good contact on what has been done. (Aby i remember you had a list of the assets? If you could, could you possibly put them in a excel spreadsheet so we can tick of what has and hasn't been done, thanks ^_^) .
Obviously before all that can be done we still need to agree on the style which can hopefully be decided at the next meeting but a few nice ones have popped up which are very cool and I'm glad we are all on the same line of believable is better, as it definitely has more of an impact on the player than an over exaggerated one.
 -The Library Setup-
Well this isn't totally set in stone but for now it should keep us all relatively in sync. The whitebox model is in the zip file.
SPAAZM
Well I'm not going to continue waffling on last words are.. If you are making a replicated object set the object and its pivot point to 0,0,0 but if you are creating a single use object then place it where you want it in the scene and export it with the pivot point at 0,0,0.


